在 《NanoDet目标检测之"搭建预测篇"》 中,我们搭建了NanoDet的环境,并用默认权重做了简单的预测,本节我们继续用自己的数据做微调。
1 准备数据
NanoDet支持yolo或者coco格式的标注,自行准备即可,我这里以yolo为例,目录结构如下:
TODO
xxx
xxx
xxx
2 配置
我们需要融合下两个配置文件,复制:
cp nanodet-plus-m_320.yml nanodet-plus-m_320_face.yml
cp nanodet-plus-m_320.yml nanodet-plus-m_320_face.yml
cp nanodet-plus-m_320.yml nanodet-plus-m_320_face.yml
修改1,保存位置:
save_dir: workspace/nanodet-plus-m_320_face
save_dir: workspace/nanodet-plus-m_320_face
save_dir: workspace/nanodet-plus-m_320_face
修改12,你的标注类别数:
head:
  name: NanoDetPlusHead
  num_classes: 1
head:
name: NanoDetPlusHead
num_classes: 1
head: name: NanoDetPlusHead num_classes: 1
aux_head:
  name: SimpleConvHead
  num_classes: 1
aux_head:
name: SimpleConvHead
num_classes: 1
aux_head: name: SimpleConvHead num_classes: 1
修改3,类别标签:
class_names: ['face']
class_names: ['face']
class_names: ['face']
修改4,数据,注意这里是从xxx_yolo.yml节选拷贝的:
data:
  train:
    name: YoloDataset
    img_path: yolo_data/train
    ann_path: yolo_data/train
    class_names: *class_names
    input_size: [320,320] #[w,h]
    keep_ratio: False
    pipeline:
      perspective: 0.0
      scale: [0.6, 1.4]
      stretch: [[0.8, 1.2], [0.8, 1.2]]
      rotation: 0
      shear: 0
      translate: 0.2
      flip: 0.5
      brightness: 0.2
      contrast: [0.6, 1.4]
      saturation: [0.5, 1.2]
      normalize: [[103.53, 116.28, 123.675], [57.375, 57.12, 58.395]]
  val:
    name: YoloDataset
    img_path: yolo_data/val
    ann_path: yolo_data/val
    class_names: *class_names
    input_size: [320,320] #[w,h]
    keep_ratio: False
    pipeline:
      normalize: [[103.53, 116.28, 123.675], [57.375, 57.12, 58.395]]
data:
train:
name: YoloDataset
img_path: yolo_data/train
ann_path: yolo_data/train
class_names: *class_names
input_size: [320,320] #[w,h]
keep_ratio: False
pipeline:
perspective: 0.0
scale: [0.6, 1.4]
stretch: [[0.8, 1.2], [0.8, 1.2]]
rotation: 0
shear: 0
translate: 0.2
flip: 0.5
brightness: 0.2
contrast: [0.6, 1.4]
saturation: [0.5, 1.2]
normalize: [[103.53, 116.28, 123.675], [57.375, 57.12, 58.395]]
val:
name: YoloDataset
img_path: yolo_data/val
ann_path: yolo_data/val
class_names: *class_names
input_size: [320,320] #[w,h]
keep_ratio: False
pipeline:
normalize: [[103.53, 116.28, 123.675], [57.375, 57.12, 58.395]]
修改batch、总迭代、效果检查点(按需修改):
device:
  gpu_ids: [0] # Set like [0, 1, 2, 3] if you have multi-GPUs
  workers_per_gpu: 8
  batchsize_per_gpu: 96
  precision: 32 # set to 16 to use AMP training
...
  total_epochs: 100
...
  val_intervals: 10
device:
gpu_ids: [0] # Set like [0, 1, 2, 3] if you have multi-GPUs
workers_per_gpu: 8
batchsize_per_gpu: 96
precision: 32 # set to 16 to use AMP training
...
total_epochs: 100
...
val_intervals: 10
device: gpu_ids: [0] # Set like [0, 1, 2, 3] if you have multi-GPUs workers_per_gpu: 8 batchsize_per_gpu: 96 precision: 32 # set to 16 to use AMP training ... total_epochs: 100 ... val_intervals: 10
修改,强制使用CPU(可选)
device:
  gpu_ids: -1 # Set like [0, 1, 2, 3] if you have multi-GPUs
  workers_per_gpu: 4
  batchsize_per_gpu: 16
  precision: 32 # set to 16 to use AMP training
device:
gpu_ids: -1 # Set like [0, 1, 2, 3] if you have multi-GPUs
workers_per_gpu: 4
batchsize_per_gpu: 16
precision: 32 # set to 16 to use AMP training
device: gpu_ids: -1 # Set like [0, 1, 2, 3] if you have multi-GPUs workers_per_gpu: 4 batchsize_per_gpu: 16 precision: 32 # set to 16 to use AMP training
3 训练
python tools/train.py ./config/nanodet-plus-m_320_face.yml
python tools/train.py ./config/nanodet-plus-m_320_face.yml
python tools/train.py ./config/nanodet-plus-m_320_face.yml
最终模型会保存在“workspace/nanodet-plus-m_320_face”中的model_best下
4 模型转化为onnx
python ./tools/export_onnx.py --cfg_path ./config/nanodet-plus-m_320_face.yml --model_path ./nanodet-plus-m_320_face/nanodet_model_best.pth
python ./tools/export_onnx.py --cfg_path ./config/nanodet-plus-m_320_face.yml --model_path ./nanodet-plus-m_320_face/nanodet_model_best.pth
python ./tools/export_onnx.py --cfg_path ./config/nanodet-plus-m_320_face.yml --model_path ./nanodet-plus-m_320_face/nanodet_model_best.pth
会生成一个nanodet.onnx
5 模型转化为ncnn
用在线工具转化(貌似挂了)
或者用官方编译好的onnx2ncnn工具(下载Ubuntu的)
./onnx2ncnn nanodet.onnx nanodet.param nanodet.bin
./onnx2ncnn nanodet.onnx nanodet.param nanodet.bin
./onnx2ncnn nanodet.onnx nanodet.param nanodet.bin
6 验证ncnn
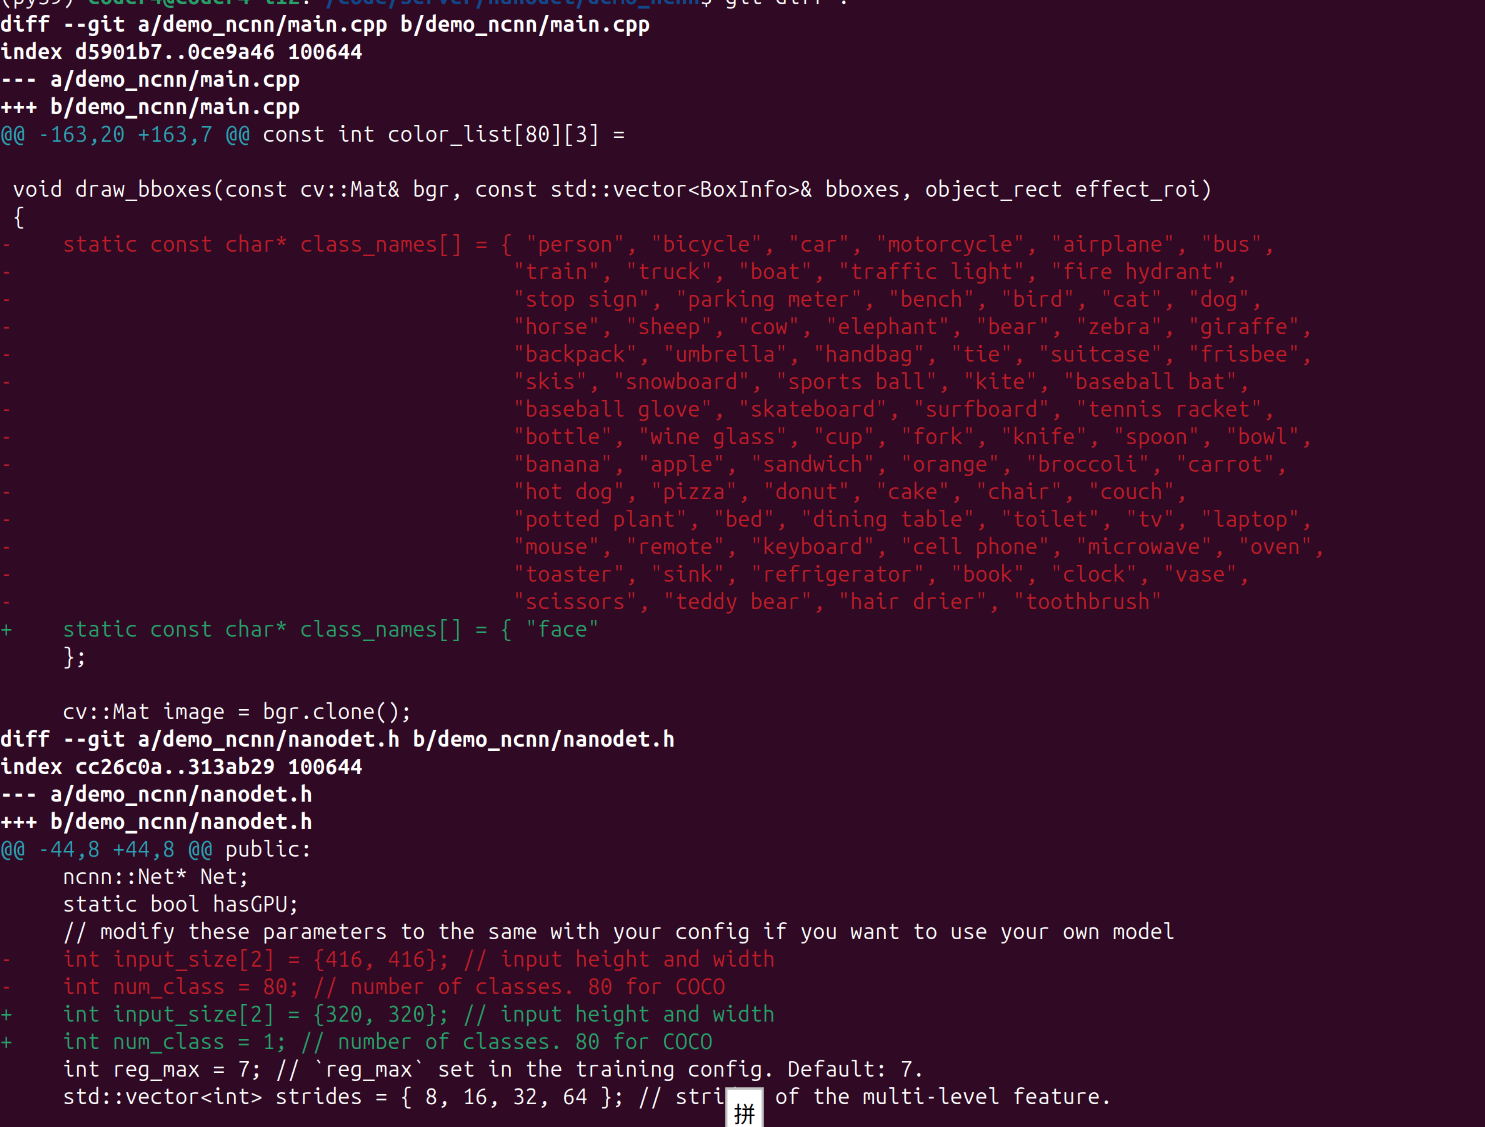
进入nanodet/demo/ncnn,修改以下点:
主要是形状、类别
编译demo
export ncnn_DIR=/path/ncnn-20240820-ubuntu-2404/lib/cmake/ncnn
cmake .
make
export ncnn_DIR=/path/ncnn-20240820-ubuntu-2404/lib/cmake/ncnn
cmake .
make
export ncnn_DIR=/path/ncnn-20240820-ubuntu-2404/lib/cmake/ncnn cmake . make
运行
./nanodet_demo 2 ~/code/server/face-still/1.mp4
./nanodet_demo 2 ~/code/server/face-still/1.mp4
./nanodet_demo 2 ~/code/server/face-still/1.mp4
benchmark
./nanodet_demo 3 0
./nanodet_demo 3 0
./nanodet_demo 3 0